
By this time in Final Fantasy VII Rebirth, you’ve witnessed first-hand the wonders the open-world has to offer. You’ve also met a few friendly (and not-so-friendly) faces like Solemn Gus and Dio. Yet, it’s returning characters from Remake like Roche and Johnny that continue to entertain us. None, though, are as forward as the so-called merc and swindler herself, Kyrie. We’ve done missions for her before, notably “The Hardest Sell”. This one, Chapter 12’s “Trouble in Paradise”, however, takes the cake.
Related
Final Fantasy VII Rebirth: How to Complete “The Hardest Sell” Mission
Kyrie’s at it again with her merc business, now with accompanying music!
While it may seem like a normal mission for some, it involves a lot of exploration, battles, and experience to finish the side mission. Luckily, we’ve got everything you need to know on and about “Trouble in Paradise” so you can get it done easy breezy.
To start this mission, head (or wheelie) to the bar area in Costa del Sol right behind the Community Noticeboard. There, meet up with Mayor Kapono, who’ll be a bit sour. He’ll badmouth Johnny and others while bringing up he got a “mercenary” to get rid of some troublesome monsters. But, of course, she decided to drink and set up shop on the beach. Kapono asks us to ‘take care’ of the problem permanently.
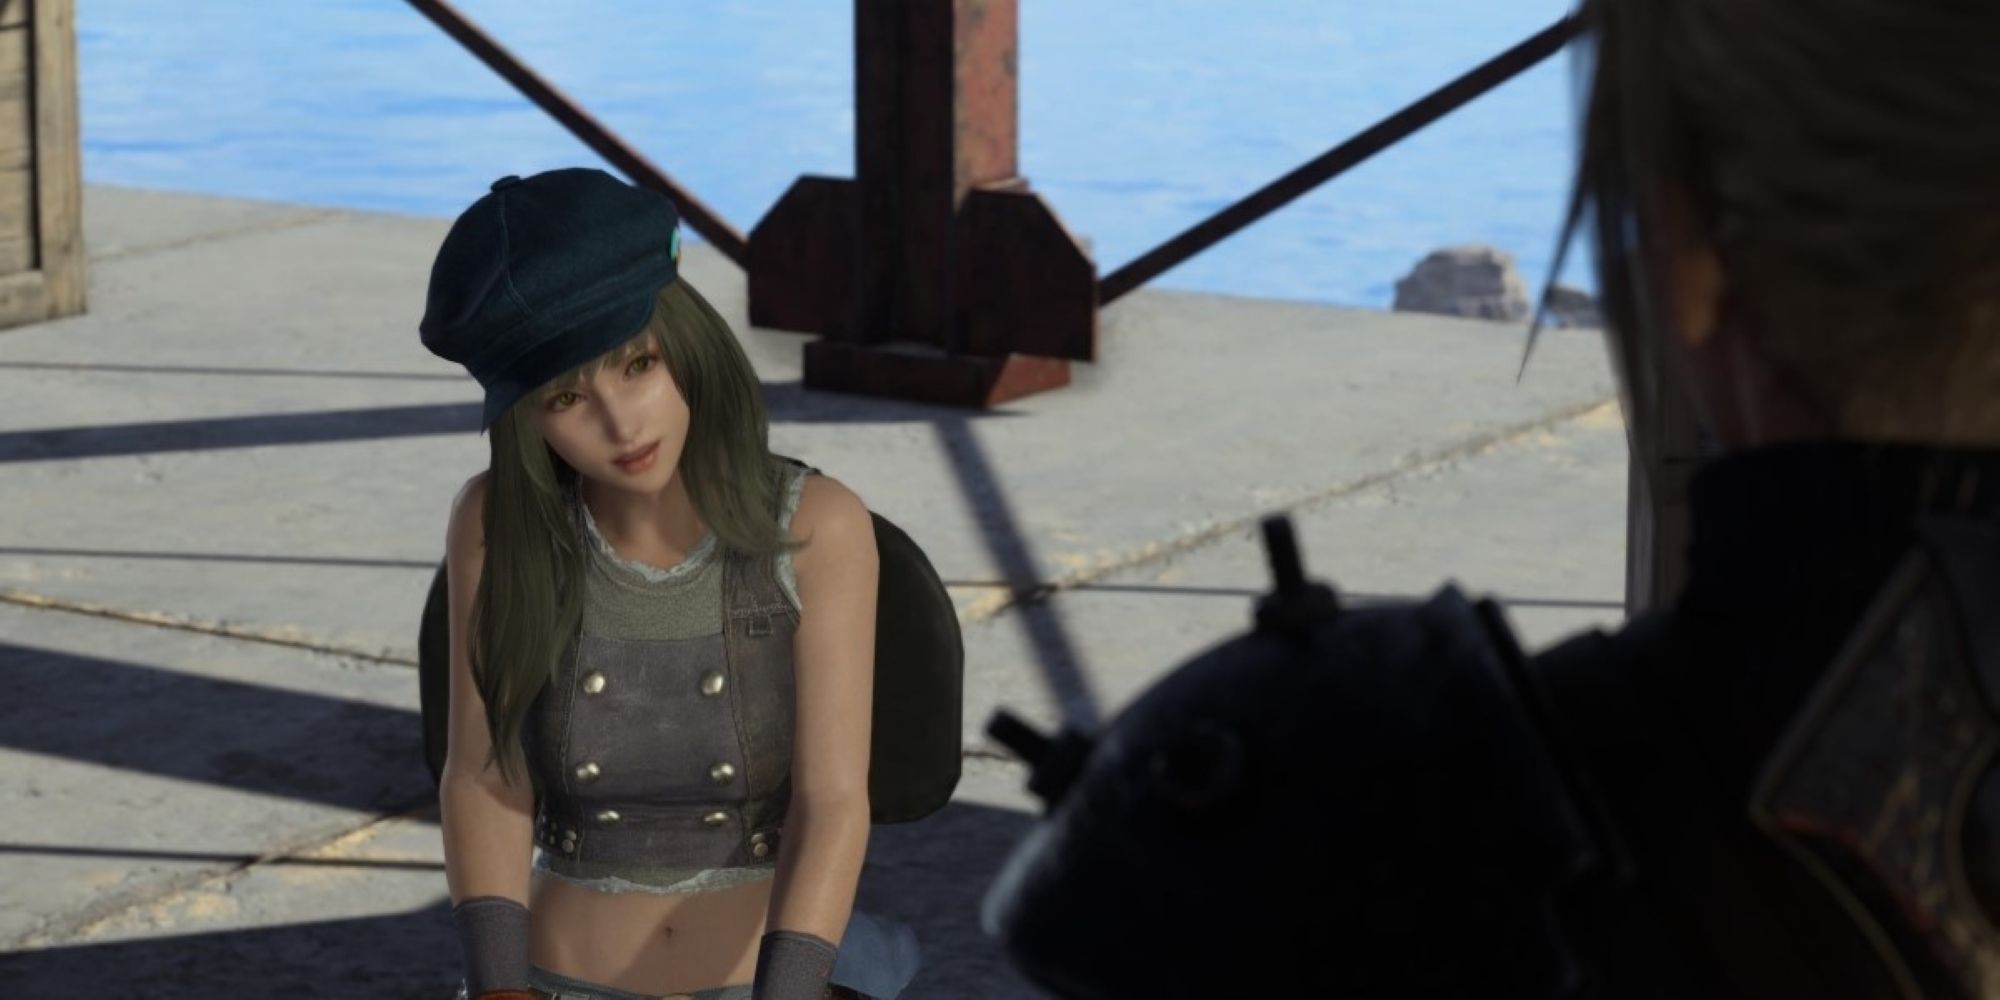
You’ll find Kyrie at her pop-up beach stall near the big stage where “Rendezvous in Costa del Sol” is. She’ll be living it up, seemingly unaware of her circumstances. After a lively discussion, she tells us she has a recipe for a legendary bait that’ll bring the creatures out. However, and to be expected, it’s up to us to gather the ingredients and slay the monsters.
Recipe: Legendary Bait
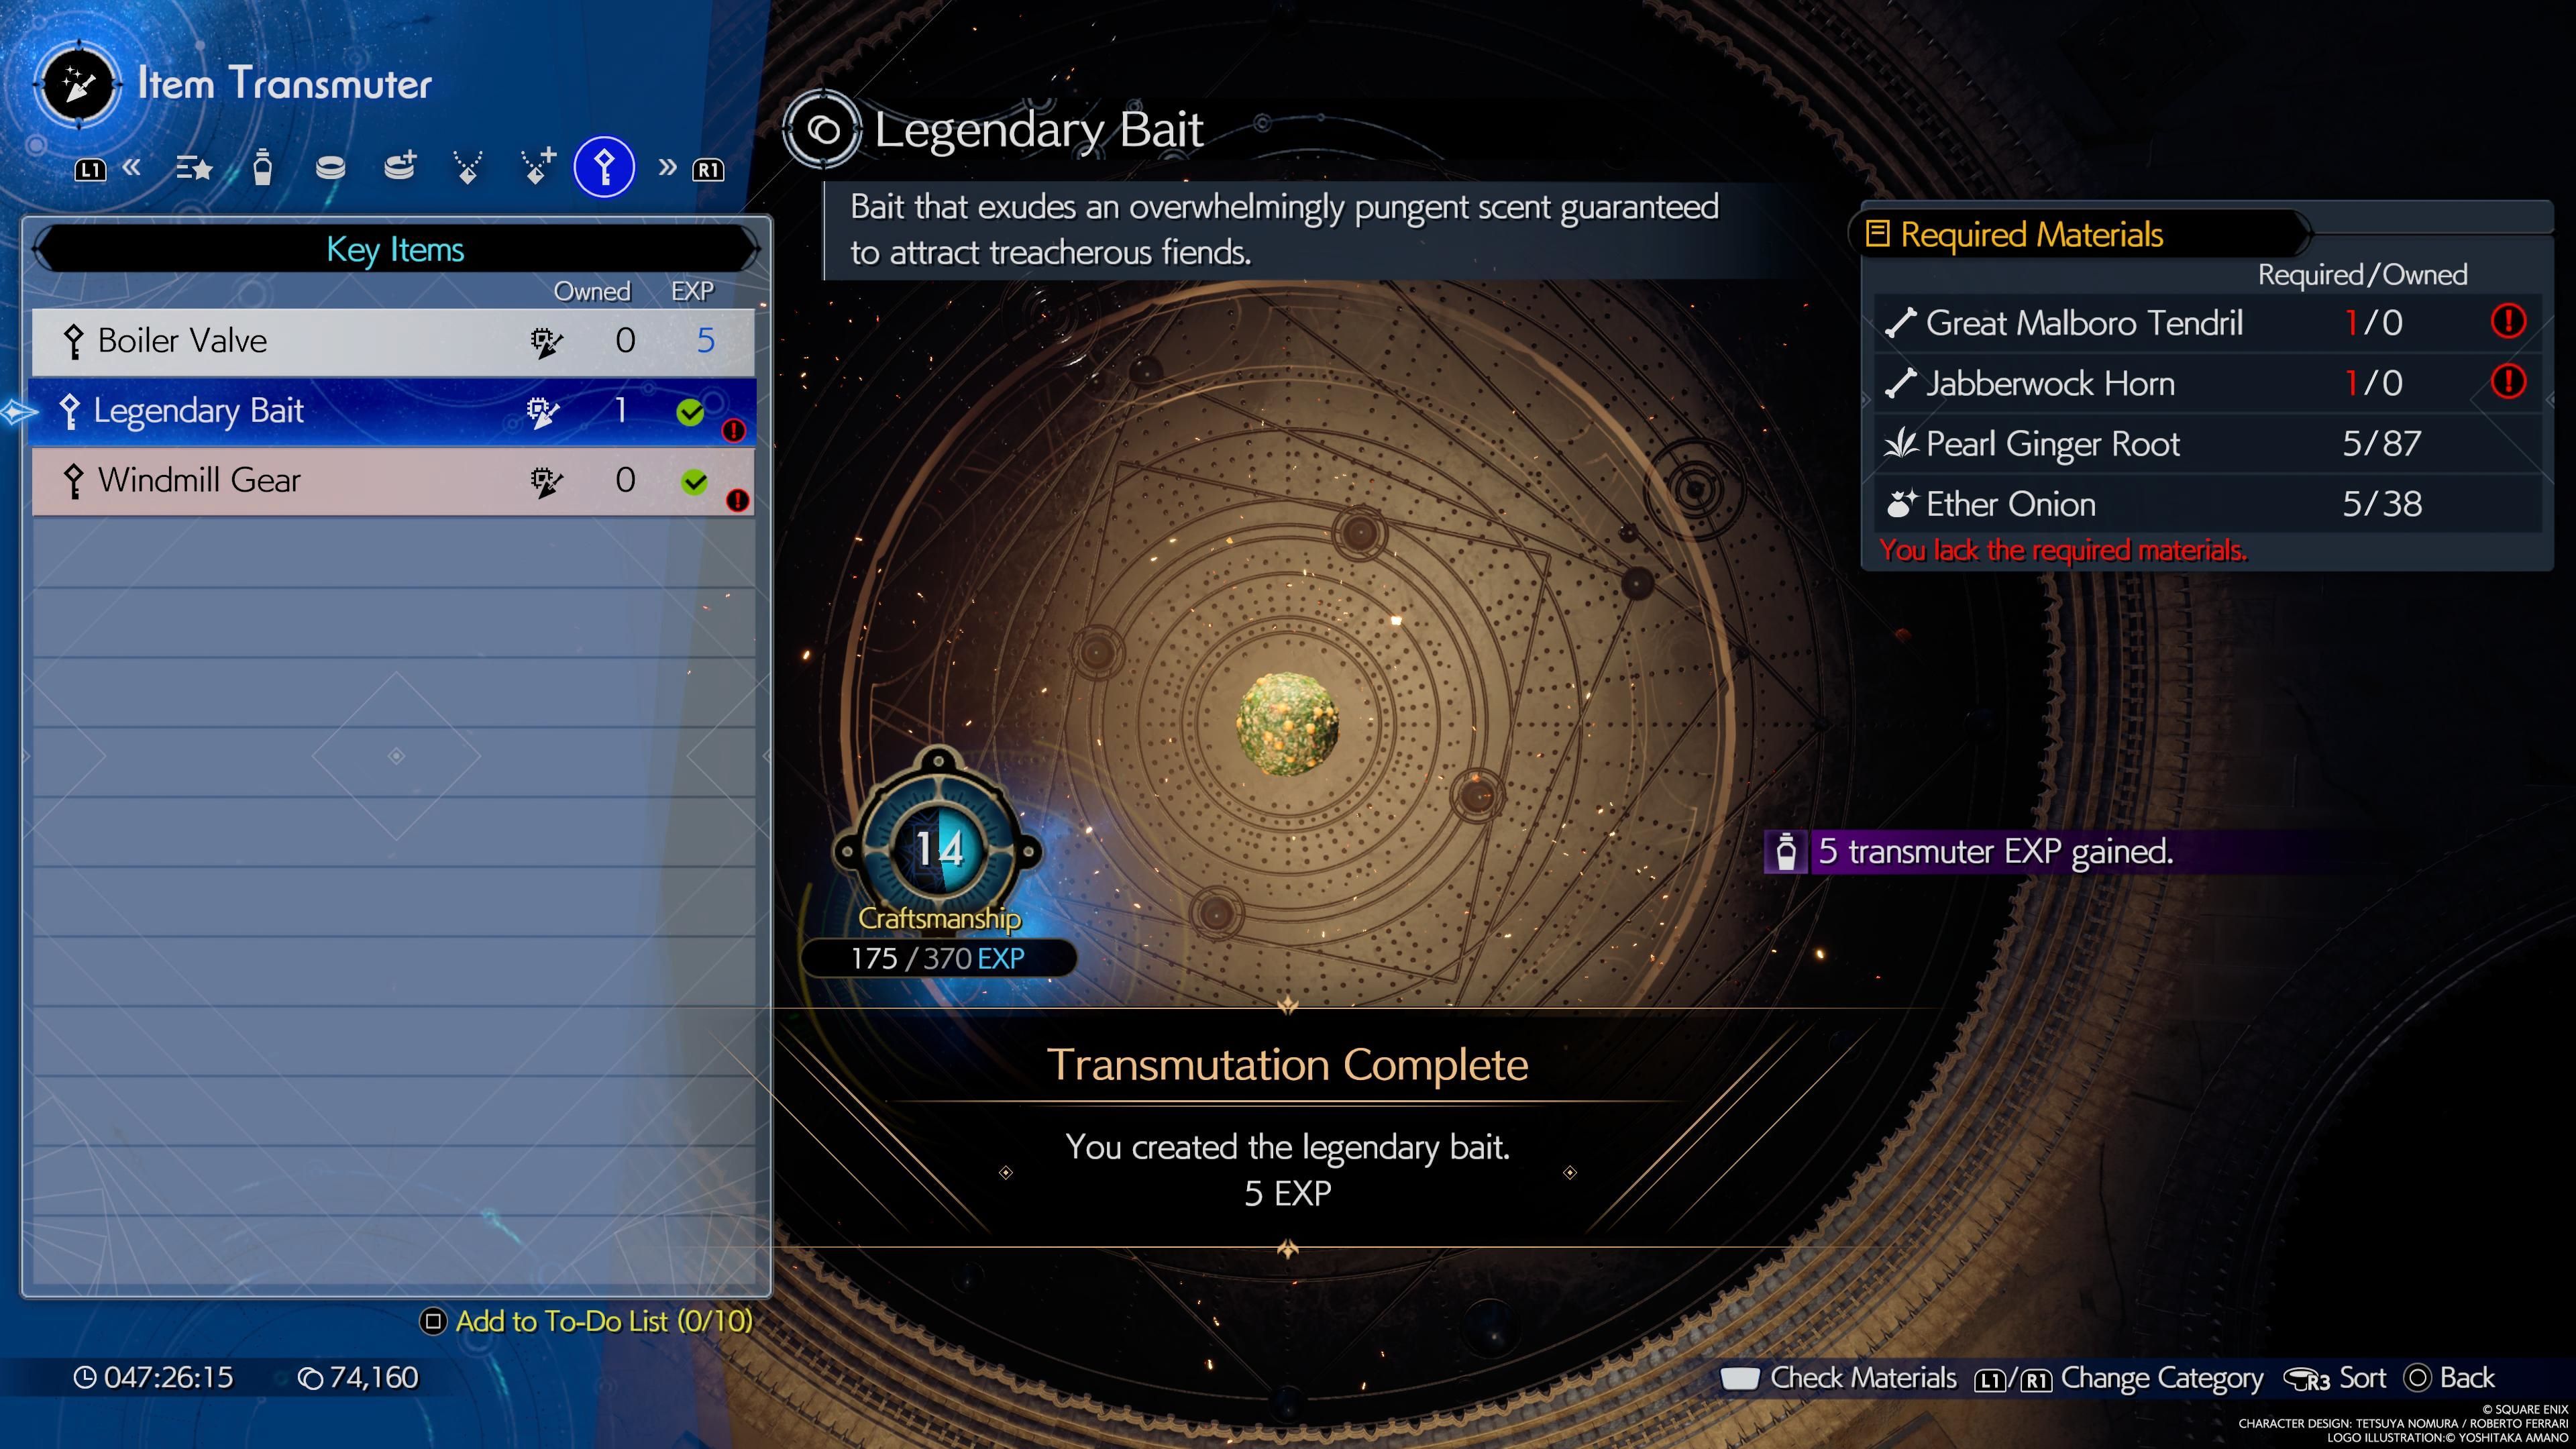
To craft the lure, you need x1 Great Malboro Tendril, x1 Jabberwock Horn, x5 Pearl Ginger Root, and x5 Ether Onion. You’ll also need to have a level 14 Craftsmanship, but that can be rectified by crafting a lot of items (even if you don’t use them). While the last two ingredients are abundant, as you likely have tons in your inventory already, the first two aren’t. In fact, they are rather rare and can only be acquired by battling two separate bosses in differing regions.
How to find a Great Malboro Tendril
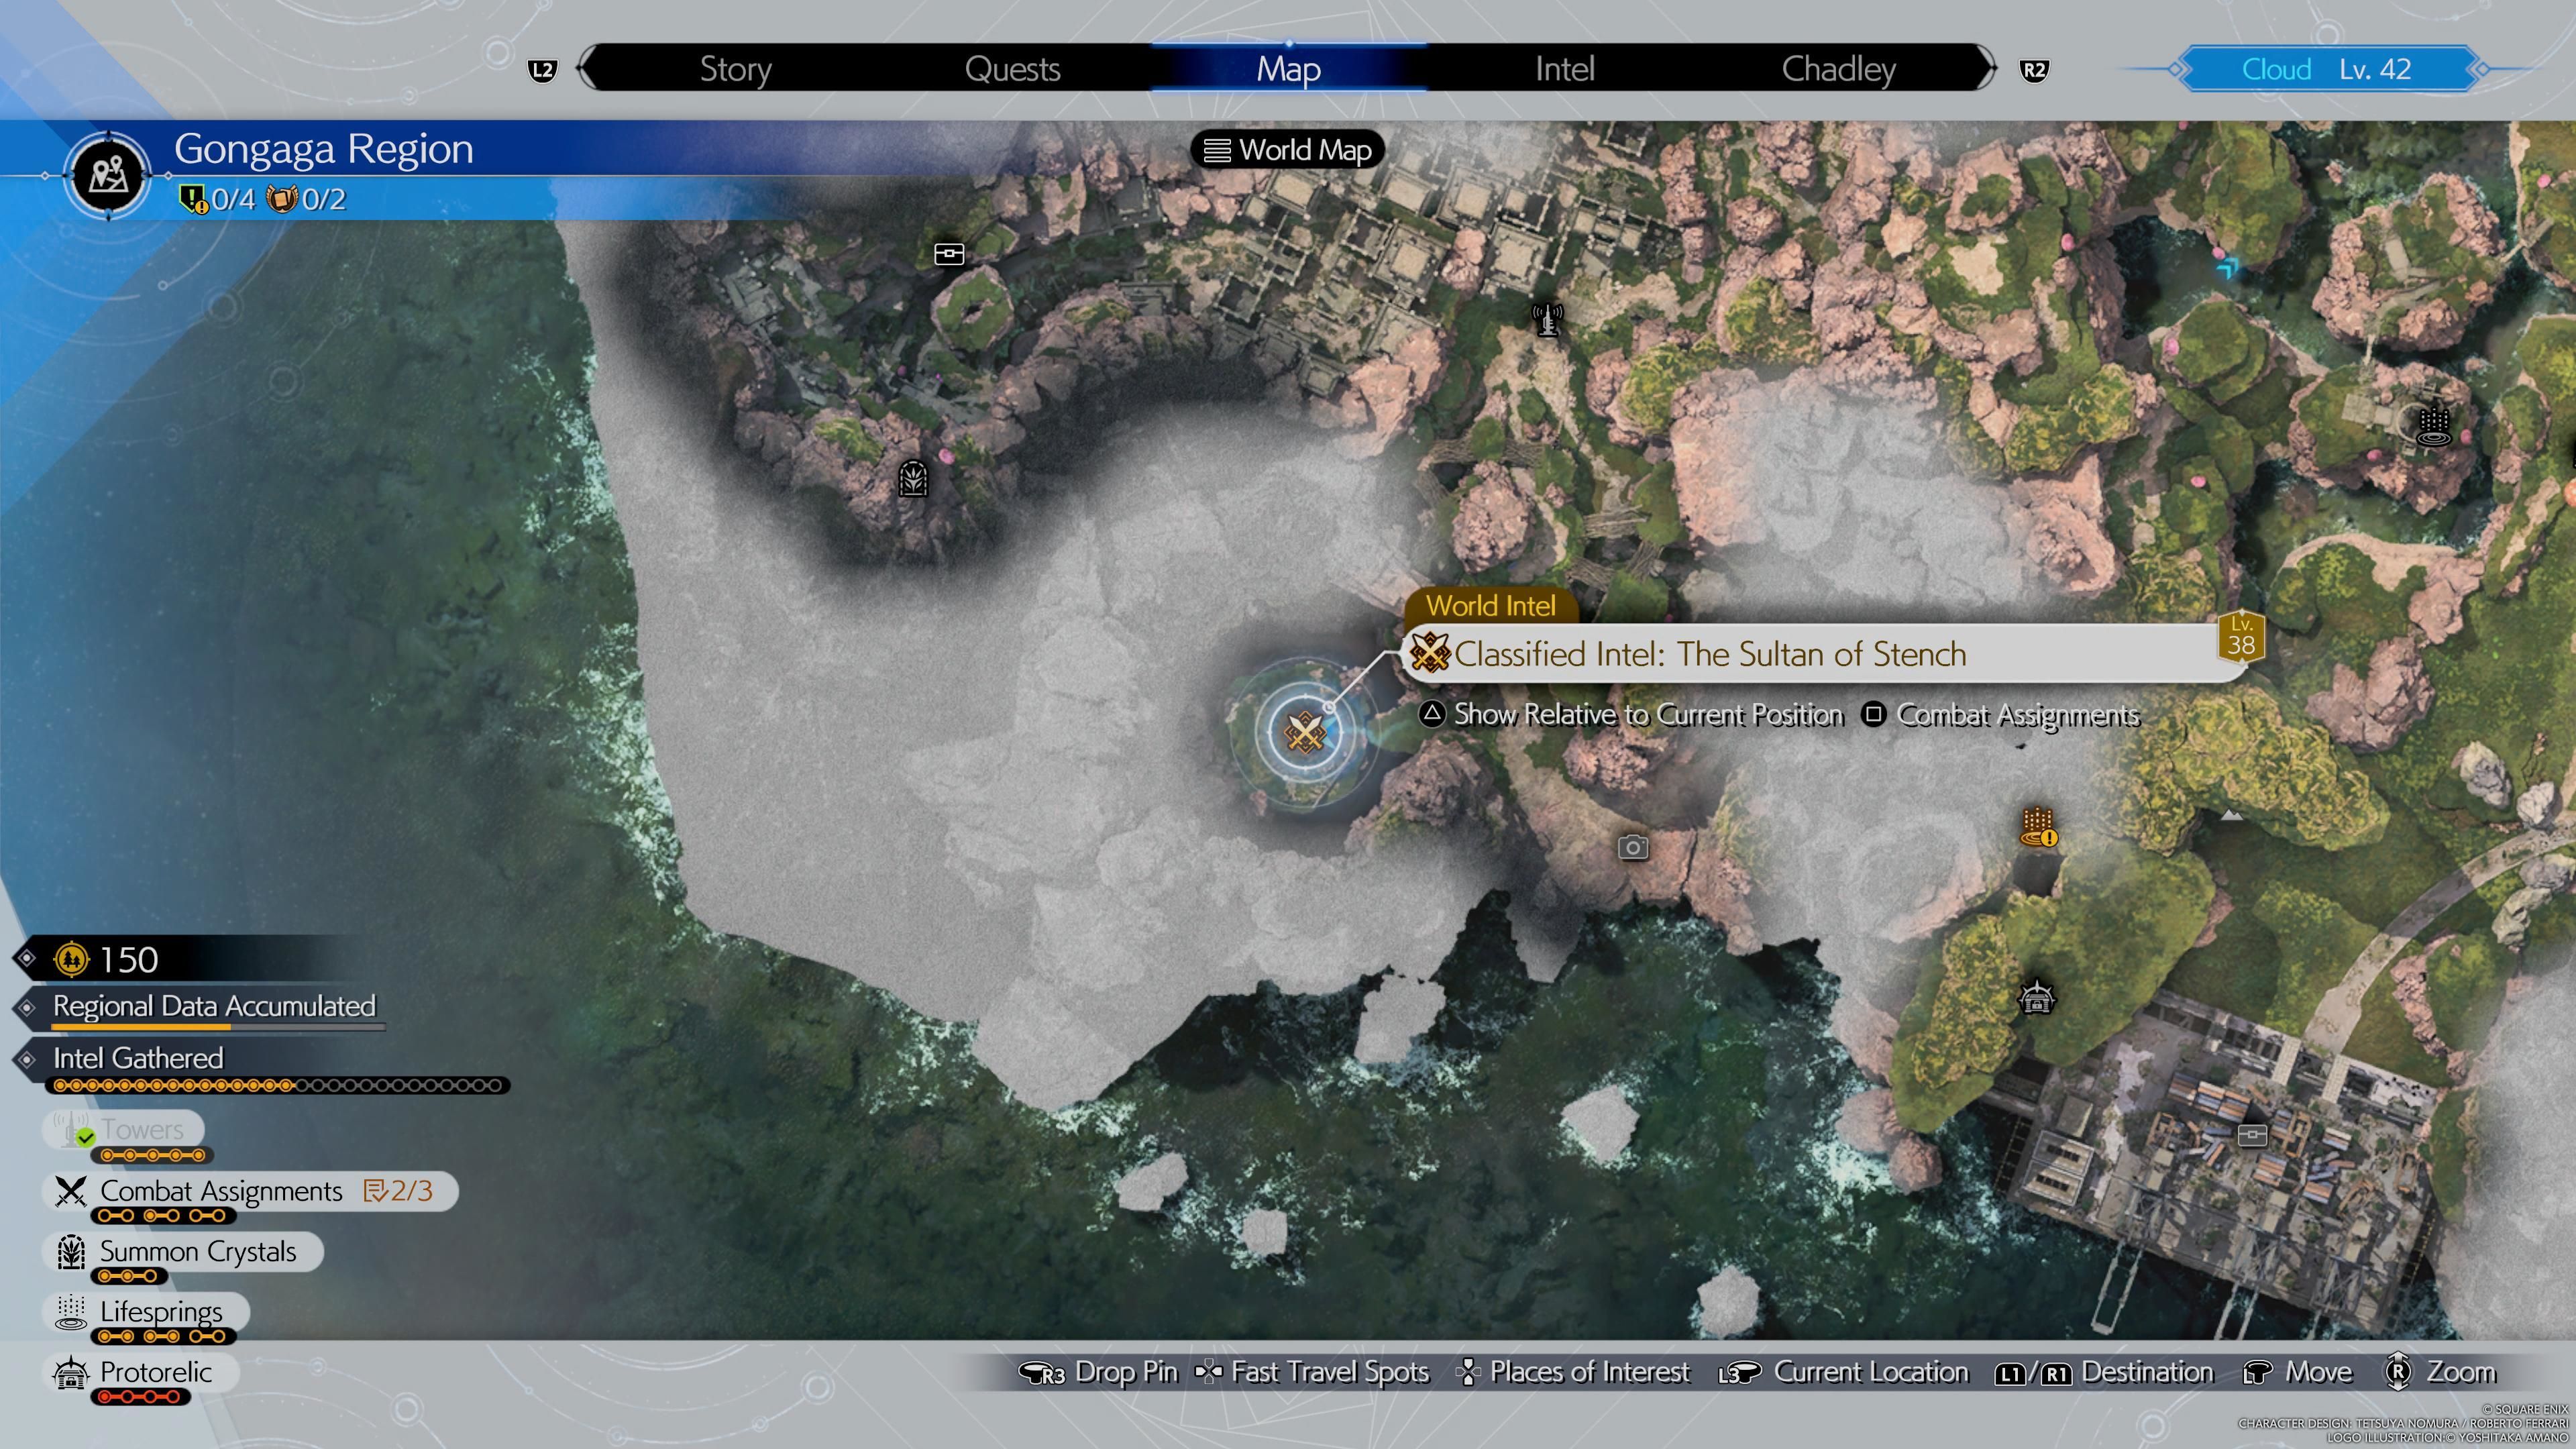
In order to find one, you need to travel to Gongaga. There, you need to discover and analyze four Lifesprings. There are six in the region, so choose the four you think are easiest. If you’re having trouble finding them, activate Gongaga’s towers and they’ll reveal their locations. And, as always, look for a glowing owl and follow it to a Lifespring. Once you’ve analyzed four, Chadley will add a new location on your map and tell you about the Classified Intel on your target: Great Malboro, also known as the Sultan of Stench.
Monster: Great Malboro
Depending on your level and equipment, your battle experience may vary in difficulty. Regardless, the Great Malboro is a pretty formidable foe. It has plenty of long-range attacks, so keep guard and try to keep a good distance between you and the vile creature. Bring some antidotes with you, as the Great Malboro’s Bad Breath is pretty potent and can cause a variety of ailments like poison and petrification. If you are able to avoid it, target it’s open mouth with magic, specifically Blizzard, as it’s weak to ice. When hit in the mouth, it’ll become staggered, so let loose and hit them hard. As for the party, I’d recommend taking Yuffie and Aerith/Barret, as both excel from long distance and are magic powerhouses. Defeat the Malboro and you’ll be rewarded with a Great Malboro Tendril.
How to find a Jabberwock Horn
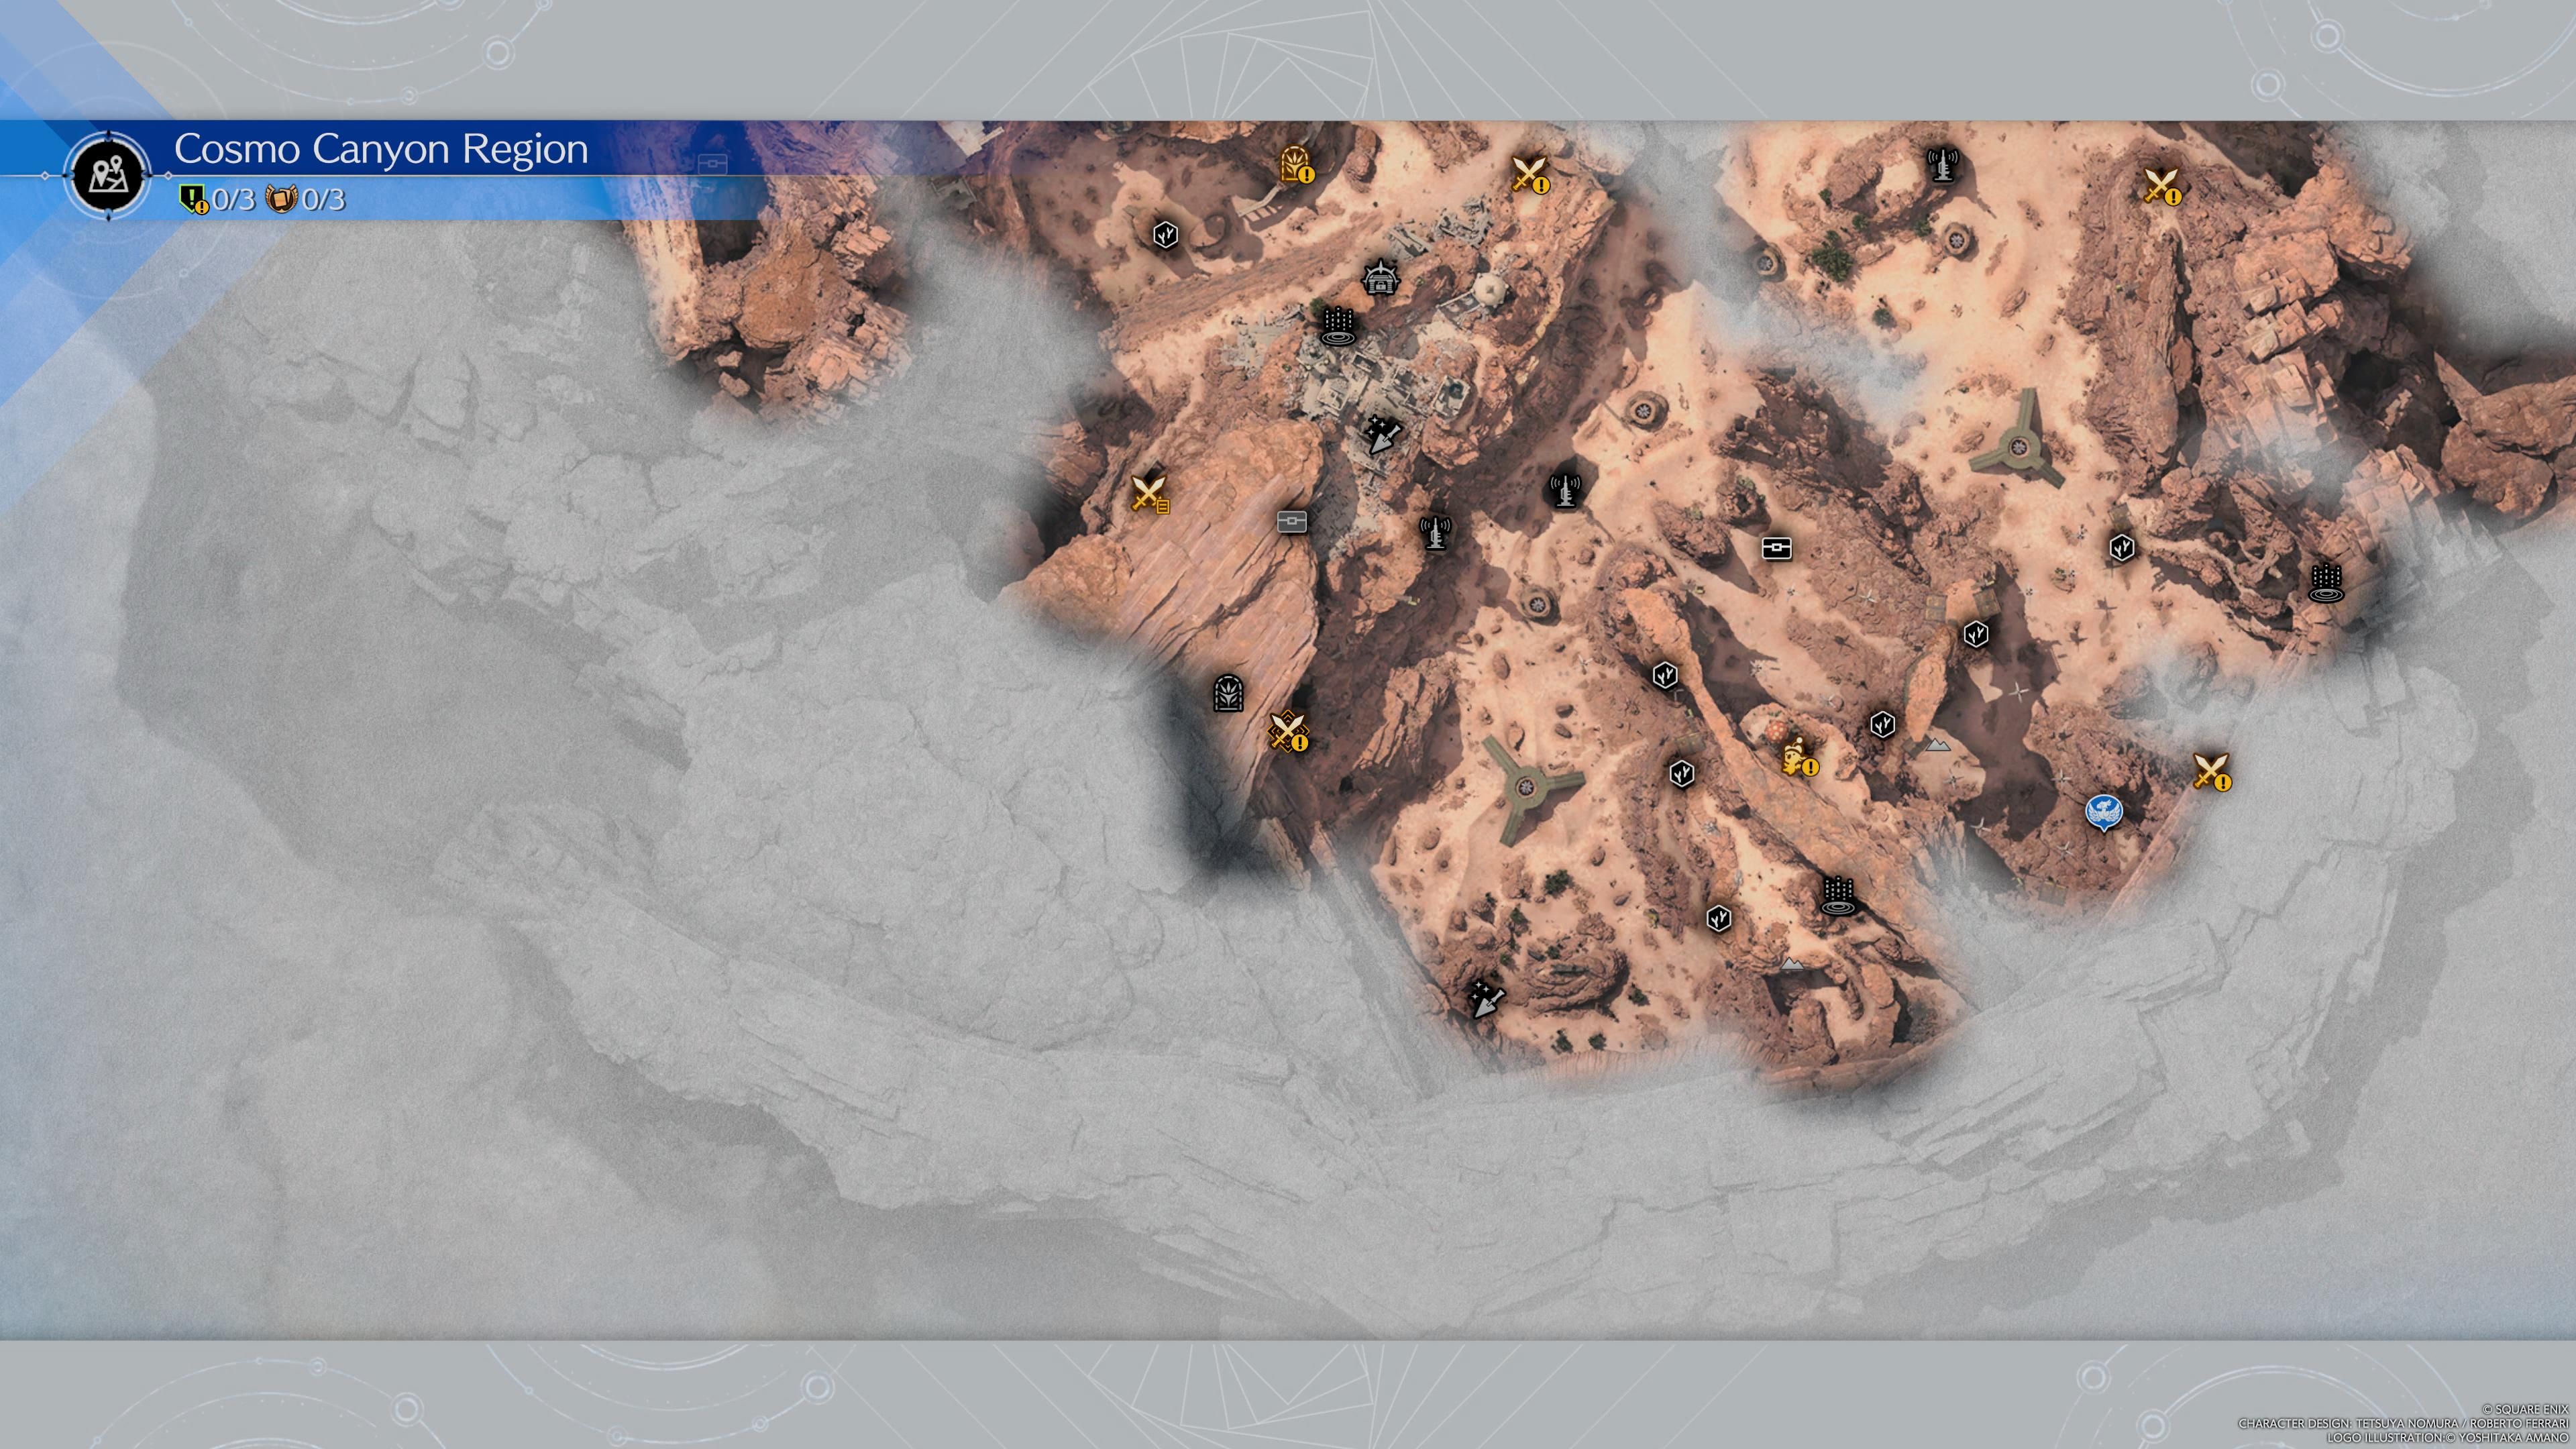
For the Jabberwock Horn, it’s a bit more of a grind to get it. Essentially, you need to go to Cosmo Canyon and analyze all six Lifesprings. As always, if you’re having trouble finding them, activate all the towers in Cosmo Canyon and they’ll reveal their locations. Listen for a hoot and keep an eye out for a glowing owl and follow it to a Lifespring. Once you’ve analyzed all six, Chadley will add a new location on your map and inform you about the Classified Intel on your target: the Wyvern Awoken, as known as the Jabberwock.
Monster: Jabberwock
Despite all the work you did to find it, the Jabberwock isn’t too hard of a battle if you’re prepared. Much like the Great Malboro, some of it’s attacks can cause ailments, particularly petrification. Make sure you have Gold Needles or use Esuna to cure your teammates or yourself. The Jabberwock’s weakness is Fire, so bring along party members with strong magic like Aerith or Tifa. Later in the battle, it’ll summon a Gorgon Shield, which will render physical attacks useless. Use strong Fire skills like Fira or Firaga to break it’s shield and pressure it. Stagger the Jabberwock and let it rip with your most powerful attacks. It’ll be down in no time flat and you’ll earn the Jabberwock Horn to use for the bait.
After you get all the required materials, craft the Legendary Bait and head to Off-Limits Beach in Costa del Sol. There’s a Combat Assignment (“Hit the Squids”) right where the door to the beach is, so you can do it if you’d like (if you do, pressure the Shankhalopod with Fire-based attacks and attack once staggered). Once you get access to the Off-Limits Beach, go to the big buoy and
Monsters: x2 Sea Devils
These crocodile-like creatures can be quite the hassle given their speed and attacks. You’ll definitely want to have someone like Yuffie or Red XIII who’s quick at dodging with you. The Sea Devils do have a weakness: ice. While you can use Blizzard and such to harm it like usual, their bios brings up another weakness: lightning. While it’s technically not a weakness, zapping the sea monsters will slow down their attacks, giving you more time to heal, regroup, or attack. Like I’ve mentioned previously, a magic-focused member like Aerith (especially with Thundara or Blizzara) would be excellent for targeting it’s weaknesses.
Report back to Kyrie
When you take down the two Sea Devils, report back to Kyrie for a job well done. Well, done by us, rather. Unfortunately for her, Cloud tells her that the Mayor wants her dead for swindling him. There is a dialogue choice, but none of the choices change the outcome, so pick whatever suits your fancy.
Either way, before Cloud can do anything, an old friend appears from the shadows: Mireille, the Guardian of the Slums from Sector 5. Or, for Kyrie’s case, her grandmother. She and Kyrie talk about their differences in tactics and how the two approach things. They have a falling out and propose being partners, which Kyrie agrees to. The two head home to Midgar, though it appears they might have a common target.
Head back to Mayor Kapono + Rewards
Speaking of, once you’re out of the cutscene, head over to Mayor Kapono at the bar and let him know that we ‘took care of the job’. He’s not happy we didn’t actually go through with his disturbing intentions, but we got rid of the meddlesome merc, so that’s enough. Weirdly, an assistant of his interrupts and hands him a note saying all his fortunes have been stolen and returned to those who need it. It’s even signed by the sunkissed Guardians of the Slums. Wonder who could’ve taken it?
Regardless, as a reward for completing the quest, you’ll receive 10 Party EXP, 3,300 EXP, Secrets of the Ninja (+10 SP for Yuffie), a deepened relationship with Yuffie, and access to the “Sands and Circuses” side-mission in the Dust Bowl.
Final Fantasy VII Rebirth
The unknown journey continues in the second part of the Final Fantasy VII Remake Trilogy. Follow Cloud and party as they journey across the world to put a stop to Sephiroth’s villainous plans.